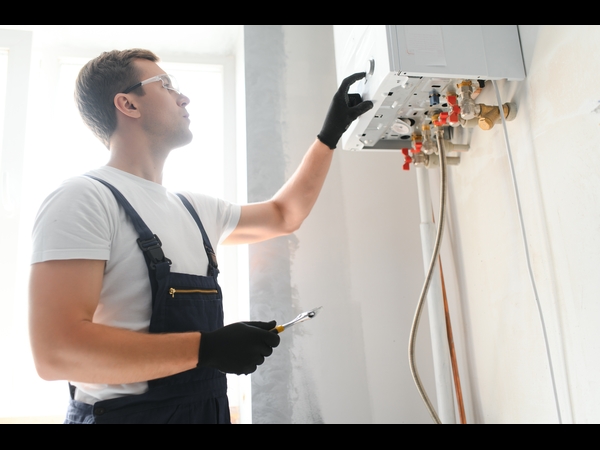
Why Won’t My Water Heater Drain (And How to Fix It)
Hot water is essential for comfort and hygiene, so a malfunctioning water heater can be a significant concern. If you’re facing an issue where your water heater won’t drain, it’s essential to understand the causes and solutions before considering a costly replacement. Below, we’ll explore the common reasons why your water heater won’t drain and provide step-by-step solutions to get it back in working order.
Common Reasons Why Your Water Heater Won’t Drain
- Clogged Drain Valve
- A clogged drain valve is the most frequent reason for a water heater failing to drain. Over time, sediment accumulates at the bottom of the tank, blocking the drain valve and preventing water flow.
- Faulty Drain Valve
- If the valve itself is defective, it may not open or close correctly, causing drainage issues. A faulty valve often requires replacement.
- High Sediment Buildup
- Water heaters can accumulate significant sediment over time, especially in areas with hard water. This sediment can create blockages or reduce the efficiency of the heater, leading to drainage problems.
- Vacuum Lock
- A vacuum lock can occur when there’s no air pressure to allow the water to flow out, trapping water in the tank.
Is Drano Bad For Pipes?

Drano is a popular pipe cleaner, marketed for home use to eliminate buildup in pipes and clear clogs. However, just because something is marketed as safe for your pipes doesn’t mean it is. People often use Drano when their sinks, bathtubs, or other plumbing backs up and want a quick fix without spending much money. Here’s why that’s a problem.
Drano’s Strong Chemicals
The chemicals Drano uses to clear clogs from your sink are unsafe for your plumbing because your plumbing isn’t supposed to handle chemicals like that. For example, when you pour Drano down your sink, it will create a chemical reaction that will bring the compound to a boiling level, and your sink isn’t meant to handle these chemicals at these temperatures. Many people who used Drano report cracks in their ceramic and damage to the connection between their pipes.
Drano claims their compound is safe to use in plumbing pipes; however, these chemicals are not safe for the binding plastic between pipes or the ceramic in your sinks, toilet, or showers. These chemicals are only graded for the metal portion of your pipes. So if your pipes use a lot of other materials or are PEX tubing, for instance, Drano can eat away at them.
Corrodes Your Plumbing
Plastic pipes often can’t handle Drano because they’re not graded to handle harsh chemicals like that. However, if your pipes are made entirely from metal, you might not have a problem with corrosion, lucky you! Unfortunately for the vast majority of us, our pipes use a mix of materials or the more common, modern PEX material. If you use Drano to clear out your pipes, you risk corroding your plumbing, which will cost you a lot more money in the long run.
Using Drano to clear out your plumbing once or twice over the course of a decade or two might not cause damage, but if you’re a frequent Drano user, you will face problems. So it would be best to be gentle on your pipes and avoid the solution altogether.
A Temporary Fix to a Potentially Serious Problem
Drano also won’t fix every type of problem your plumbing might have. While it may work to clear a clog caused by hair. For example, if you’re facing a log because you have roots in your drains, then using the Drano won’t help. It would be best to call a plumber immediately when you’re facing backups to ensure that you’re treating the right issue.
If you spend too much time treating the wrong problem with Drano, your plumbing situation could worsen and cost you much money in the long run. Using Drano to avoid the bigger problem is not an effective way to clear your drains permanently.
Drano Alternatives
If you don’t have the money to call a plumber immediately, you can use Drano alternatives that are much safer for your pipes. For example, one alternative you can use to freshen the room’s smell is pouring baking soda and vinegar down your drains. This will cause a bubbling chemical reaction that can help shift and clogs
Drano is a popular pipe cleaner, marketed for home use to eliminate buildup in pipes and clear clogs. However, just because something is marketed as safe for your pipes doesn’t mean it is. People often use Drano when their sinks, bathtubs, or other plumbing backs up and want a quick fix without spending much money. Here’s why that’s a problem.
Drano’s Strong Chemicals
The chemicals Drano uses to clear clogs from your sink are unsafe for your plumbing because your plumbing isn’t supposed to handle chemicals like that. For example, when you pour Drano down your sink, it will create a chemical reaction that will bring the compound to a boiling level, and your sink isn’t meant to handle these chemicals at these temperatures. Many people who used Drano report cracks in their ceramic and damage to the connection between their pipes.
Drano claims their compound is safe to use in plumbing pipes; however, these chemicals are not safe for the binding plastic between pipes or the ceramic in your sinks, toilet, or showers. These chemicals are only graded for the metal portion of your pipes. So if your pipes use a lot of other materials or are PEX tubing, for instance, Drano can eat away at them.
Corrodes Your Plumbing
Plastic pipes often can’t handle Drano because they’re not graded to handle harsh chemicals like that. However, if your pipes are made entirely from metal, you might not have a problem with corrosion, lucky you! Unfortunately for the vast majority of us, our pipes use a mix of materials or the more common, modern PEX material. If you use Drano to clear out your pipes, you risk corroding your plumbing, which will cost you a lot more money in the long run.
Using Drano to clear out your plumbing once or twice over the course of a decade or two might not cause damage, but if you’re a frequent Drano user, you will face problems. So it would be best to be gentle on your pipes and avoid the solution altogether.
A Temporary Fix to a Potentially Serious Problem
Drano also won’t fix every type of problem your plumbing might have. While it may work to clear a clog caused by hair. For example, if you’re facing a log because you have roots in your drains, then using the Drano won’t help. It would be best to call a plumber immediately when you’re facing backups to ensure that you’re treating the right issue.
If you spend too much time treating the wrong problem with Drano, your plumbing situation could worsen and cost you much money in the long run. Using Drano to avoid the bigger problem is not an effective way to clear your drains permanently.
Drano Alternatives
If you don’t have the money to call a plumber immediately, you can use Drano alternatives that are much safer for your pipes. For example, one alternative you can use to freshen the room’s smell is pouring baking soda and vinegar down your drains. This will cause a bubbling chemical reaction that can help shift and clogs and is completely safe for your pipes. The odor elimination is a nice benefit!
Final Thoughts
Contact us at (520) 214-2149 today, and our experts will help diagnose what’s wrong with your drain, and we will fix it. The longer you wait to fix whatever is going on with your pipes, the worse your plumbing situation will become. Therefore, it is best to immediately handle plumbing situations with a professional, so you don’t make things worse by wrecking your pipes with Drano.
Drano can destroy your sinks, toilets, and bathtubs if you use it too often, and many alternatives are safer. If you damage your plumbing more than it already was by using harsh chemicals, it will cost you even more to get everything fixed.
and is completely safe for your pipes. The odor elimination is a nice benefit!
Final Thoughts
Contact us at (520) 214-2149 today, and our experts will help diagnose what’s wrong with your drain, and we will fix it. The longer you wait to fix whatever is going on with your pipes, the worse your plumbing situation will become. Therefore, it is best to immediately handle plumbing situations with a professional, so you don’t make things worse by wrecking your pipes with Drano.
Drano can destroy your sinks, toilets, and bathtubs if you use it too often, and many alternatives are safer. If you damage your plumbing more than it already was by using harsh chemicals, it will cost you even more to get everything fixed.
How to Hire a Plumbing Contractor

When the plumbing goes out it is one of the most stressful things about being a homeowner. The best way to ensure you get the job done right is to hire a professional plumber to come in and fix your situation. Otherwise, if you do the job independently, you could risk handling the wrong problem and worsening your building’s plumbing . Please continue reading to learn how to hire a plumbing contractor and what questions you need to ask before you sign a contract. Fortunately, finding a reputable plumbing service is easy when you know how to go about it.
Pick a Plumbing Contractor with a Valid License
Most states across the US make it illegal for a contractor to work on plumbing without a proper license. However, people can get a plumber’s license to start as an apprentice, a journeyman, and then a licensed plumber. Plumbing problems are serious; a well-known professional must handle the situation and get your plumbing back on track.
However, just because most states make plumbing illegal without a license doesn’t mean people don’t attempt to fix plumbing unlicensed. Therefore, before signing any contracts, you must ensure that you are talking to a licensed plumber, not your neighborhood handyman.
What is Plumber Insurance?
Plumber insurance is insurance that your plumber carries before they work on any job. This insurance covers injuries, property damage, and any other liabilities or problems that might occur while working. If you speak with a commercial plumber, you should always ask if they’re insured to ensure you don’t cost yourself money in the long run. Some states require plumbers to carry plumber insurance, but others don’t, so it’s up to you to ensure that whomever you hire has insurance.
Jobs a Plumbing Contractor Can Help You With
If you have any trouble with your home or building plumbing, you can hire a plumbing contractor to assess and deal with the situation. The following are examples of jobs that you can call a plumber to resolve.
- A broken water heater
- Any clogs within your drain that are causing a water backup somewhere in the building
- A clogged or malfunctioning toilet
- Flooding basement
- Plumbing leaks
There are many other situations where you might also need a plumber to fix your problem. Hiring a plumbing contractor can resolve anything that has to do with the running water in your home.
Questions to ask a Plumbing Contractor
Before signing a contract with a plumbing contractor, you need to ask a few questions to ensure they’re legit. Otherwise, you risk putting your plumbing needs in the hands of someone who doesn’t know what they’re doing or doesn’t have the license to handle the situation. The following questions are what you should ask when you hire a plumber.
- Do you have a plumbing license and plumber insurance?
- How much will it cost for a consultation and service the problem altogether?
- Are there any plumbing situations the contractor specializes in, and do they relate to your problem?
- How long do you take to respond to plumbing situations on average?
- How long do you estimate the work will take, and do you want me present in the home while you work?
- Do you offer 24-hour help for an emergency plumbing situation?
Asking these questions will get you on the right track to hiring the right plumber to handle your situation. You need a professional service to come in and take care of any damaged plumbing needs you have. If you neglect to ask these questions, you risk signing someone up to handle the job that doesn’t know how to fix your problem. Plumbing is super sensitive, so you want things done correctly.
Final Thoughts
Contact us at (520) 214-2149 today, and we will help you with any plumbing concerns in your building. We can work on commercial and residential buildings, so if you have a problem, you can get a hold of us to fix it. Our professionals have been in the plumbing industry for years, and we can handle almost any situation you have. We also offer excellent customer service, so you can relax when you talk to us, knowing that it won’t be a negative discussion.
The Most Common Reasons Your Toilet Won’t Flush

A toilet that won’t flush is a common, yet distressing situation. If your toilet won’t flush, there can be a lot of causes with simple solutions. Toilets not flushing is one of the homeowners’ most common plumbing issues.
Please continue reading to learn why your toilet won’t flush and how to fix it with home remedies.
Your Toilet Is Clogged
The number one reason why toilets won’t flush is that they are clogged with material. Even if you’re the only person who uses your toilet, it still gets a lot of use, and it will eventually clog. It would help if you always kept a plunger in your bathroom so that you can solve this problem every time it arises immediately.
Fortunately, you can solve most of your toilet clogging problems by using a plunger to dislodge the material until you can flush it. Try not to flush the toilet until you’re positive you’ve dislodged the blockage; otherwise, you can flood your bathroom. However, more serious clogs that are deeper in your plumbing system could require professional intervention instead of a home remedy.
There’s Something Wrong with Your Toilet’s Lift Chain
Another reason your toilet won’t flush could be because something is wrong with the lift chain inside the tank. Toilets flush by pushing down on the handle, which engages the rubber float valve to rise inside the tank. The chain pulls the valve up, and this causes water to flush out the waste in your bowl. If your chain is broken, flushing won’t work. The immediate solution to this problem is to open up your toilet tank and lift the chain manually. This will flush your toilet until you permanently fix the chain.
If you notice your lift chain is broken inside the tank, you can buy a replacement online or at a hardware shop. Older toilets could experience lift chain breakage after several uses.
Your Toilet Tank Doesn’t Have Enough Water.
You need enough water in your toilet tank if you want to flush it properly. If insufficient water in your toilet tank floods your bowl when you flush, your toilet won’t do its job properly. The immediate solution is to manually add enough water to your tank so that you can flush right away until you’ve solved the problem permanently.
If your toilet tank doesn’t get enough water, you may have a cracked toilet bowl, your sewer line vent might be blocked, or your fill valve could be damaged. Check all these areas within your toilet tank to see which issue is causing your problem and fix whatever is damaged.
Your Toilet’s Drainpipes Aren’t Optimal.
Unfortunately, you can’t fix all toilet issues at home on your own. For example, if your toilet drainpipes aren’t optimal for your drainage needs, you’ll frequently experience plumbing backups, or your toilet won’t flush. Also, if your toilet stream pipes aren’t formed right, you’ll have to call a plumber to diagnose and resolve this problem.
Attempting to rearrange your toilet drainpipes on your own could cause severe plumbing damage that could cost you tons of money. Damaging your pipes could also void a home warranty if yours covers plumbing.
Your Toilet’s Rim Holes are Clogged
Your toilet won’t flush if the rim holes are clogged with debris or calcium. If your house uses hard water, you might have a calcium buildup where your ramjets are placed. Fortunately, it’s easy to dissolve calcium in your toilet bowl with everyday home cleaning supplies.
You first need to ensure no bleach cleaner is in your toilet bowl because it will negatively interact with other chemicals and cause dangerous gas. Then, you can put distilled white vinegar in a spray bottle and spray the bottom of the realm of your toilet where your jets are with the vinegar. White vinegar is a natural dissolvent for calcium buildup.
After you let the vinegar sit on The Jets for at least 20 minutes, you can use your toilet as you normally would. If calcium buildup is the problem, this method should resolve the issue. .
Call a Trustworthy Plumber
If you try all these methods and your toilet still won’t flush, there might be something more severe wrong with your plumbing system. Contact us at (520) 214-2149 today, and we’ll look at your clogged toilet and help you fix the problem so you can get back to regular life. Clogged toilets are unpleasant, so let us handle the mess.
When to Conduct a Sewer Line Cleanout

Every home and property owner eventually needs to take care of their plumbing. When you use something every day, there’s maintenance that you need to partake in to make it run optimally. Plumbing is a necessary part of any active establishment that people inhabit, and sewer line cleanouts are part of the regular maintenance required.
Please continue reading to learn when it’s time to conduct a sewer line clean now and how to do it. Our guide will help you through the process.
Get Rid of Bad Smells from Your Sink
If you notice odors from your kitchen sink or bathtub that can’t be washed away, it might be time for a sewer line cleanout. Clogged dirt, hard water, and anything else that goes down your drain can cause these odors. Water is constantly going through drains, and when there’s something else trapped in that drain, bad smells will arise.
Cleaning out your sewer lines will release bad odor for good. When you clean a clogged sink without removing the blockage, you only cover up the odor instead of removing it.
Reduce the Amount of Water Backups You Experience
Have you noticed your sink or bathtub floods with water once every couple of months or more? Even when you use a drain snake, there could be a blockage deep down in your pipes that you can’t access without opening your main sewer line. After you clean out your main sewer line, you can expect a massive decrease in water backups for the next year until it’s time to clean it.
Cleaning out your main sewer line at least once a year is a great way to prevent your water from backing up. Water backups can bring out nasty stuff from your pipes that you don’t want to deal with after a long day. Unfortunately, many people don’t realize that there is a main sewer line they can access to minimize their plumbing issues.
Use Tools to Get Debris Out of Your Pipes
Some of the most common tools people use to clean out their main sewer lines are drain snakes and wrenches. When you use a drain snake, you can get right into your main sewer line and pull out any of the large debris trapped in your upper pipes. Your wrench will allow you to access more areas of your sewer line to clean out any blockages thoroughly.
Depending on your sewer line’s components and pipes, you might need to invest in more tools. However, once you determine all the tools you need to get the job done you can remove your drainpipe cap and insert your snake until you thoroughly clean your pipes.
Find Your Main Sewer Line
You might have trouble finding it if you’ve never accessed the main sewer line to your current home. So the first thing you need to do is know what to look for. Your main sewer line is a 4-inch wide pipe with a screw cap. Typically, your main sewer line pipe will be white; however, this color can change depending on your house’s pipes.
You can usually find your main sewer line in your basement, crawl space, or backyard. Some houses might have the main sewer line in the front yard, although this is uncommon because they can seem unsightly. If you have a large house, you might be searching for a while before you find your sewer pipeline, and you might benefit from hiring a professional instead.
After you locate your main sewer line, you can get to work cleaning it out to prevent water backups and eradicate bad odors in your home from your plumbing. However, sometimes taking care of the direct drain to these facilities isn’t enough, and it’s time to find the main sewer line instead.
Hire a Professional When Standard Methods Don’t Work
Tons of situations can cause all sorts of plumbing issues throughout your home, and sometimes cleaning out your main sewer line isn’t enough to rectify those problems. If you’ve cleaned out your main sewer line and you’re still experiencing water backups or bad odors from your plumbing, then consider hiring a professional to handle the job to prevent damaging your plumbing system.
Contact us at (520) 214-2149 to resolve your plumbing issues or clean your main sewer line. If you don’t feel comfortable cleaning out the main sewer line yourself, we’ll be happy to do the dirty work for you.
Why Your Bathtub Is Cogged and How to Fix It

Why Your Bathtub Is Cogged and How to Fix It
When your bathtub is clogged, it can ruin a relaxing night after work. People use their bathtubs to unwind and get clean. A bathtub clog will completely counteract that goal. There are many reasons why your bathtub might be clogged, and there are several resolutions to that problem to go through.
Please continue reading our guide to learn how to unclog your bathtub and why it is clogged in the first place.
Too Much Hair in The Drain
The number one reason most people have a clogged bathtub is because there’s too much hair in the drain. When you use your bathtub frequently, it’s natural for some hair to fall out during your bath or shower. You might not notice the hair falling out immediately, but it does happen, and all of that hair accumulates in your drain eventually.
The easiest way to resolve this problem is to buy a drain snake and remove the bathtub plug to get in there. You can snake out as much hair as possible, which should solve the problem in most instances. If you clean out your drains regularly, you won’t experience clogged bathtubs very often.
Soap Scum Buildup Causing a Blockage
Sometimes the reason your drain is clogged is because there’s too much soap and buildup inside. You can recognize soap scum inside your drain by taking a flashlight and peeking into the drain. If your drain is covered in chalky residue, you have a soap scum problem.
Fortunately, you can dissolve soap scum with common household cleaning solutions. Chances are that you already have these products on hand. Pour baking soda directly into your drain and chase it with distilled white vinegar. Ensure that there’s no bleach cleaner in your bathtub before you do this procedure.
After you pour the vinegar to chase the baking soda, your sink will bubble up because the chemicals will react together. Don’t worry! This is a safe chemical reaction. Once the bubbles dissolve, follow up with boiling water to eliminate the soap scum in your drain.
High Mineral Content in Your Water
Many people have hard water, which means a high mineral content can cause a blockage in your drains and clog your bathtub. Some people combat this problem by purchasing a water softener, but once the mineral buildup has already occurred, it’s too late for that method. Fortunately, you can use a cheap at-home solution to minimize the buil-up hard water in your bathtub drain.
Pour distilled white vinegar down your drain and allow it to sit for at least 20 minutes to combat as much buildup as possible. White vinegar is an excellent tool to dissolve calcium buildup in your bathtub as long as there’s no bleach treatment already present.
Tracking Too Much Dirt into The Tub
If you’re the outdoorsy type, then there’s a chance you’re tracking too much dirt into your bathtub and clogging your drains that way. With all of the hair and water that goes through drains, your bathtub is experiencing enough. Dirt and mud can get caught in pre-existing debris and cause a clog.
The best way to prevent tracking too much dirt into your bathtub is to hose off your feet outside before you enter the house after swimming or hiking. Beach sand is especially gritty and the most common type of dirt that will get stuck in your drain, while most other dirt will go down with no problem. If you don’t have a hose, you can wipe off your feet with a towel before entering your bathtub.
If it’s too late and you already have too much sand in your drain, you must follow this method to unclog it. You have a drain snake to remove all hair and debris and pour water down it to ensure your pipes are clear. Sand causes clogs by attaching itself to other materials in your bathtub drain.
Pick a Great Plumber If Home Remedies Fail
If you’ve tried all these methods and are still experiencing a clogged bathtub, you should hire a professional to fix the problem. If home remedies don’t work, you might have something wrong with your plumbing system. Contact us at (520) 214-2149 today to get an estimate on your plumbing needs and answer any concerns you have about your clogged bathtub.
How to Repair Galvanized Water Pipe Leaks
If you own a home built before the 1960s, chances are it has galvanized water pipes. These pipes, once a popular choice for plumbing, are now known for their propensity to corrode and leak as they age. In this guide, we’ll walk you through the process of repairing galvanized water pipe leaks and discuss when it might be time to replace them entirely.
Why Galvanized Pipes Leak
Galvanized pipes are made of steel coated with zinc to prevent rusting. Over time, however, the zinc coating erodes, exposing the steel to water and causing corrosion. This corrosion leads to leaks and reduced water pressure, making repairs a frequent necessity.
How to Repair Galvanized Water Pipe Leaks
While repairing galvanized pipes can be a DIY project, it requires the right tools and some plumbing know-how. Follow these steps to fix a leak in your galvanized water pipe:
- Gather Your Tools
- You’ll need a reciprocating saw, a steel replacement pipe, rubber couplings, and a pipe wrench.
- Turn Off the Water Supply
- Before you begin, shut off the water supply to the damaged pipe to prevent any flooding.
- Cut Out the Damaged Section
- Use the reciprocating saw to remove the corroded section of the pipe where the leak is located.
- Measure and Cut the Replacement Pipe
- Measure the gap left by the removed pipe section and cut the replacement steel pipe to the appropriate length.
- Attach the New Pipe
- Connect the new steel pipe using rubber couplings on each end. Tighten the couplings with the wrench to ensure a secure fit.
- Restore the Water Supply
- Once the new pipe is in place, turn the water supply back on and check for any leaks.
When to Replace Galvanized Pipes
While repairing a single leak is often a quick fix, recurring leaks can indicate that your galvanized pipes are reaching the end of their lifespan. Galvanized pipes typically last 80-100 years, meaning that many homes built in the 1960s are due for a complete repipe. Replacing old galvanized pipes with modern materials like PEX or copper can prevent future leaks, improve water quality, and increase your home’s value.
Should You Hire a Professional?
If you’re unsure about your ability to repair galvanized pipe leaks, or if you’re dealing with extensive corrosion, it’s best to hire a professional plumber. At Economy Plumbing Service, LLC, we specialize in both repairing and replacing galvanized pipes in Tucson, AZ. Our experienced team can assess the condition of your plumbing system and recommend the best course of action, whether it’s a simple pipe repair or a complete repiping service.
How Long Will Galvanized Pipes Last?
Given their limited lifespan, it’s important for homeowners with galvanized pipes to monitor for signs of corrosion and leaks regularly. If your pipes are nearing the 80-100 year mark, it may be time to consider a full replacement to avoid future plumbing issues.
Contact Us for Expert Plumbing Services in Tucson, AZ!
If you’re dealing with leaking galvanized pipes, don’t wait until the problem gets worse. Contact Economy Plumbing Service, LLC online, give us a call at (520) 885-3510, or request a service appointment today for prompt and reliable plumbing services in Tucson, AZ. Our team can help you repair leaks, replace old pipes, and ensure your plumbing system is in top condition!
Uses for a PEX Pipe

PEX pipes are color-coded tools to help carry hot and cold water from place to place. PEX pipes are normally used for water heaters to carry water safely while it is hot. PEX pipes come in several colors to help you distinguish what type of water is in the pipe, although this color coding is not necessary for the plumbing industry. PEX pipes are convenient and easy to install, making them a great option for homeowners.
Different Colors of PEX Pipes
You can get PEX pipes in different colors and sizes for your convenience. The colors of the PEX pipes help identify the best use for them. Identifying your PEX pipes on sight by their colors can help you with your plumbing needs. The following are the colors you can get for your PEX pipe and what the colors mean.
- Gray PEX pipes are fantastic for both hot and cold water. This neutral color means that this pipe is suitable either way and is convenient for people who don’t want to hook up a specific color for a specific water temperature
- White PEX pipes also work for both hot and cold water. Therefore, choosing between a gray PEX pipe and a white PEX pipe is just a matter of personal preference because they serve the same purpose
- Red PEX pipes are for hot water
- Blue PEX pipes are for cold water
If you prefer color coding to help distinguish water temperature, red and blue pipes are perfect. However, if you prefer a neutral-colored pipe, you can choose white or gray pipes for your water needs. There are many options to choose from when you use PEX pipes.
Plumbing Uses for a PEX Pipe
People like using PEX pipes in their plumbing because they are flexible, making it easy for people to move them around the way they need them and for them to direct water easily. In addition, because PEX pipes are so flexible, it is easy to prevent leaks by reducing the number of pipe connection points you would have with solid pipes. They are also…
- Ideal for heating and cooling systems
- Great for water heaters
- Used to aid with electrical cable insulation
Many people are switching from traditional copper pipes to PEX pipes because PEX pipes are more cost-effective and require fewer connection points. PEX pipes are additionally more user-friendly for people to install than traditional copper pipes.
Can PEX Pipes be Used for Outdoor Plumbing?
No, PEX pipes cannot be used for outdoor plumbing. A PEX pipe is an indoor plumbing solution only. This type of plumbing pipe is not ideal for outdoor use because this paper is not designed to withstand weather conditions or outdoor climates. Outdoor plumbing requires sturdy pipes that can handle weather erosion.
Some people still choose to use PEX pipes for outdoor plumbing; however, these pipes have not lasted nearly as long as copper pipes for outdoor plumbing. In addition, PEX pipes are made from plastic, so they deteriorate easily under the sun’s rays and in harsh environments. This type of outdoor pipe can be a good quick solution for a plumbing issue, but it’s not a long-time solution for an outdoor plumbing issue.

How Long to Install PEX Pipes
One of the benefits people find of using PEX pipes is that they’re easy and quick to install. PEX pipes don’t require as many connections as copper pipes, and they’re very flexible to move around easily. Some people can install pax pipes in as little as 10 minutes.
On the other hand, copper plumbing can take days to install, depending on the size of the house. This is because there are many more connection points associated with copper plumbing which is why it takes much longer to install than PEX plumbing. Most people also hire A plumber to handle copper pipes because they have so many different connection points.
Some people hire plumbers for PEX pipes too, but this plumbing job is cheaper and takes less time than the plumbing job associated with copper pipes. Contact us today for PEX pipe installation.
Why Hire a Professional for Your Water Heater Repair

Water heater repair is an essential part of owning a home. Water heaters are common appliances that require repairs and maintenance every few years because of how frequently they’re used. Unfortunately, most people use their water heaters every day, so eventually, they will get worn out. While fixing it yourself can be tempting to save money, hiring a professional will save you more money in the long run.
Saving Time on Water Heater Repair
Trying to fix your water heater yourself can cost you a lot of time. Between figuring out what the issue is with your water heater, learning how to fix that issue, and even finding out you were fixing the wrong issue, you can waste a lot of time trying to fix your water heater yourself. Therefore, hiring a plumber to fix your water heater is essential for ensuring that the job is done right and saving you time.
On top of that, you don’t want to waste your time trying to fix something you don’t know how to fix. In addition, finding free time outside work can be difficult, and you don’t want to burden yourself with more work in your off time.
Save Money
Many people try fixing their water heater because they think it’ll save them money on plumber service fees. However, if you’re not a professional plumber, you could cause yourself more trouble and cost yourself more money by conducting the water heater repair yourself. In addition, if you have fixed the wrong parts on your water heater, that’s money on wasted parts that you spent and wasted.
Hiring a plumber can also help determine if it’s time to buy a new water heater. Getting the answers to your problems right away is the best way to save money on your services. If you try a bunch of fixes on a water heater that’s just broken, then you will waste a lot of money on repairs that don’t work. A plumber will properly diagnose and resolve your problems so that you don’t waste money on the wrong procedures to fix your water heater.
Reduce Stress
Fixing your water heater can be agonizing if you’re not a trained professional plumber. Plumbers know what they’re doing, which is why people hire them for their services. Water heater repair is difficult, and many things can cause your water heater to malfunction. A plumber has seen all sorts of water heater repairs during their career and can quickly diagnose and resolve your issue with your water heater.
Types of Water Heater Problems
A lot of problems can happen with your water heater that may need professional intervention from a plumber. Water heaters have many parts and can get worn out over the years, especially with daily use. The following are types of water heater problems that you may find yourself needing a plumber to fix:
- Your water heater isn’t producing any hot water
- A strange smell comes from the water from your water heater
- The water is extremely hot and might burn your skin
- Your water heater is leaking
- It takes hours for your water to get hot again after use
All of these situations can be extremely frustrating and interrupt your daily life. However, these situations are also common for people who use water heaters frequently. A plumber can investigate your water heater to see which water heater repairs they can use to help you.
Can You Fix a Water Heater Yourself?
While it is possible to fix your water heater problems yourself, it can be difficult and frustrating for untrained people to fix a water heater. Plumbers conduct water heater repairs all the time, making it very easy for them to diagnose and resolve any problems you might have with your water heater. In addition, most people want to get their water heaters fixed as soon as possible because they need to use their water heaters daily.
Hiring a professional for your water heater repairs is the best way to ensure that your water heater gets repaired without further problems and allows you to use your water heater sooner than you’d be able to if you tried to fix it yourself. So contact us today to repair your water heater.

Are you purchasing a new home or recently made the change? The market is crazy out there and folks are closing the deal without too much thought about what problems they might be inheriting – they just want a place to live! We can’t blame them, everyone needs a place to live. But let us tell you there are some instances where you need to pump the breaks! This time on the Economy Plumbing Services blog we’re talking about what to look for whenApril Showers Bring May Flowers… And Need Good Drainage! it comes to the plumbing in your potential new home!
What to Look For in Your Potential New Home’s Plumbing
Small Leaks
Be especially aware of any small leaks in the home. Even the smallest dribble can lead to a major headache (physically and financially) down the line. Leaks lead to cracks in walls, damaged wood and metal, no matter where they are. If the leak is in the kitchen or bathroom, that can suggest a larger, underlying problem that needs to be looked at.
Any leak, small or otherwise can lead to serious damages (and serious bills) if left unmanaged. Find out the source of the leak, determine the cause and fix it now while it’s still small.
What Are The Pipes Made Of? What’s Their Age? Structure?
Pipes. They are crucial, go figure, to inspect for a number of throughout the home can be made of a few different materials, and depending on what material you have and the location you’re in this can help you identify potential problems before they happen! An example! Copper piping is commonly used to supply hot water in the home, PVC for cold as well as drain systems. Cast iron piping is also typically used in waste systems. If you see any cast iron pipes you might want to just consider getting those replaced right away as cast iron can rust.
Now the structure… take a look at how the pipes and the plumbing system is designed in your home. Make note of the size of pipes and check that they are the right size and strength to support the amount of water that might be flowing through it. If it’s not, leaks can develop and bursting is possible.
Not sure if your pipes are the right materials and structure? Give us or your local plumber a call – we can take a look and offer our expert opinions! If there’s something wrong we’ll give you the solutions you need!
What’s the Story, Plumbing Glory?
Ok, thats a weird way to phrase it – we mean what’s the history of the plumbing in the home? Is it original? How many years ago was it installed? Older homes are much more likely to have old galvanized steel pipes which is no good for modern plumbing. Galvanized pipes are prone to corrosion and build-up. Before you purchase the property know the age of these pipes and whether or not getting them replaced (sooner rather than later!) Not sure what galvanized steel pipes look like? Take a refrigerator magnet with you and try and stick it to the pipes. If it sticks? Hey, that’s steel!
Follow Your Nose
Check for any smells or bad odors coming from the plumbing system. Anything that smells off is a sure sign that the pipes are damaged somewhere and repairs are needed. Really get in close and smell, a fresh coat of paint or other work done on a home to get it ready for sale might mask the scent more than you realize.
Plumbing troubles are a headache at the best of times, and an absolute nightmare at the worst. Finding them ahead of time and getting them fixed (or just avoiding the potential entirely and looking at a different home) is going to save you costly repairs, damages, and sleepless nights of fixing. Call your friendly local plumber (Tucson you know who to call) to get things sorted before your move-in date.
If Water Goes Through It Or To It, We Do It!
Connect with us


- July 2026
- June 2026
- May 2026
- April 2026
- March 2026
- January 2026
- December 2025
- July 2025
- June 2025
- May 2025
- April 2025
- March 2025
- February 2025
- January 2025
- December 2024
- November 2024
- October 2024
- September 2024
- July 2024
- June 2024
- May 2024
- April 2024
- March 2024
- February 2024
- January 2024
- May 2023
- April 2023
- March 2023
- February 2023
- January 2023
- December 2022
- November 2022
- October 2022
- September 2022
- August 2022
- July 2022
- June 2022
- April 2022
- March 2022
- February 2022
- January 2022
- December 2021
- November 2021
- October 2021
- September 2021
- August 2021
- July 2021
- June 2021
- May 2021
- April 2021
- March 2021
- February 2021
- January 2021
- November 2020
- October 2020
- September 2020
- August 2020
- July 2020
- June 2020
- May 2020
- April 2020
- March 2020
- February 2020
- January 2020
- October 2019
- September 2019
- July 2019
Archives
- Drain Cleaning
- Eco-Friendly Plumbing
- Economy Plumbing Service, LLC Service
- Emergency Plumbing Services
- Hard Water
- Hydrojetting
- Pipe Insulation
- Pipe Repair
- Plumbing Fixtures
- Plumbing Inspections
- Plumbing Installation
- Plumbing Maintenance
- Plumbing Repair
- Plumbing Services
- Repiping
- Sewer Line
- Uncategorized
- Water Heater Installation
- Water Heaters
- Water Line Replacement
- Water Pressure